Do you have a hard time understanding why so many people keep telling you about the infamous gauge swatch and the right knitting tension? Don’t worry! We’ve gathered all the information you need concerning gauge swatches here.
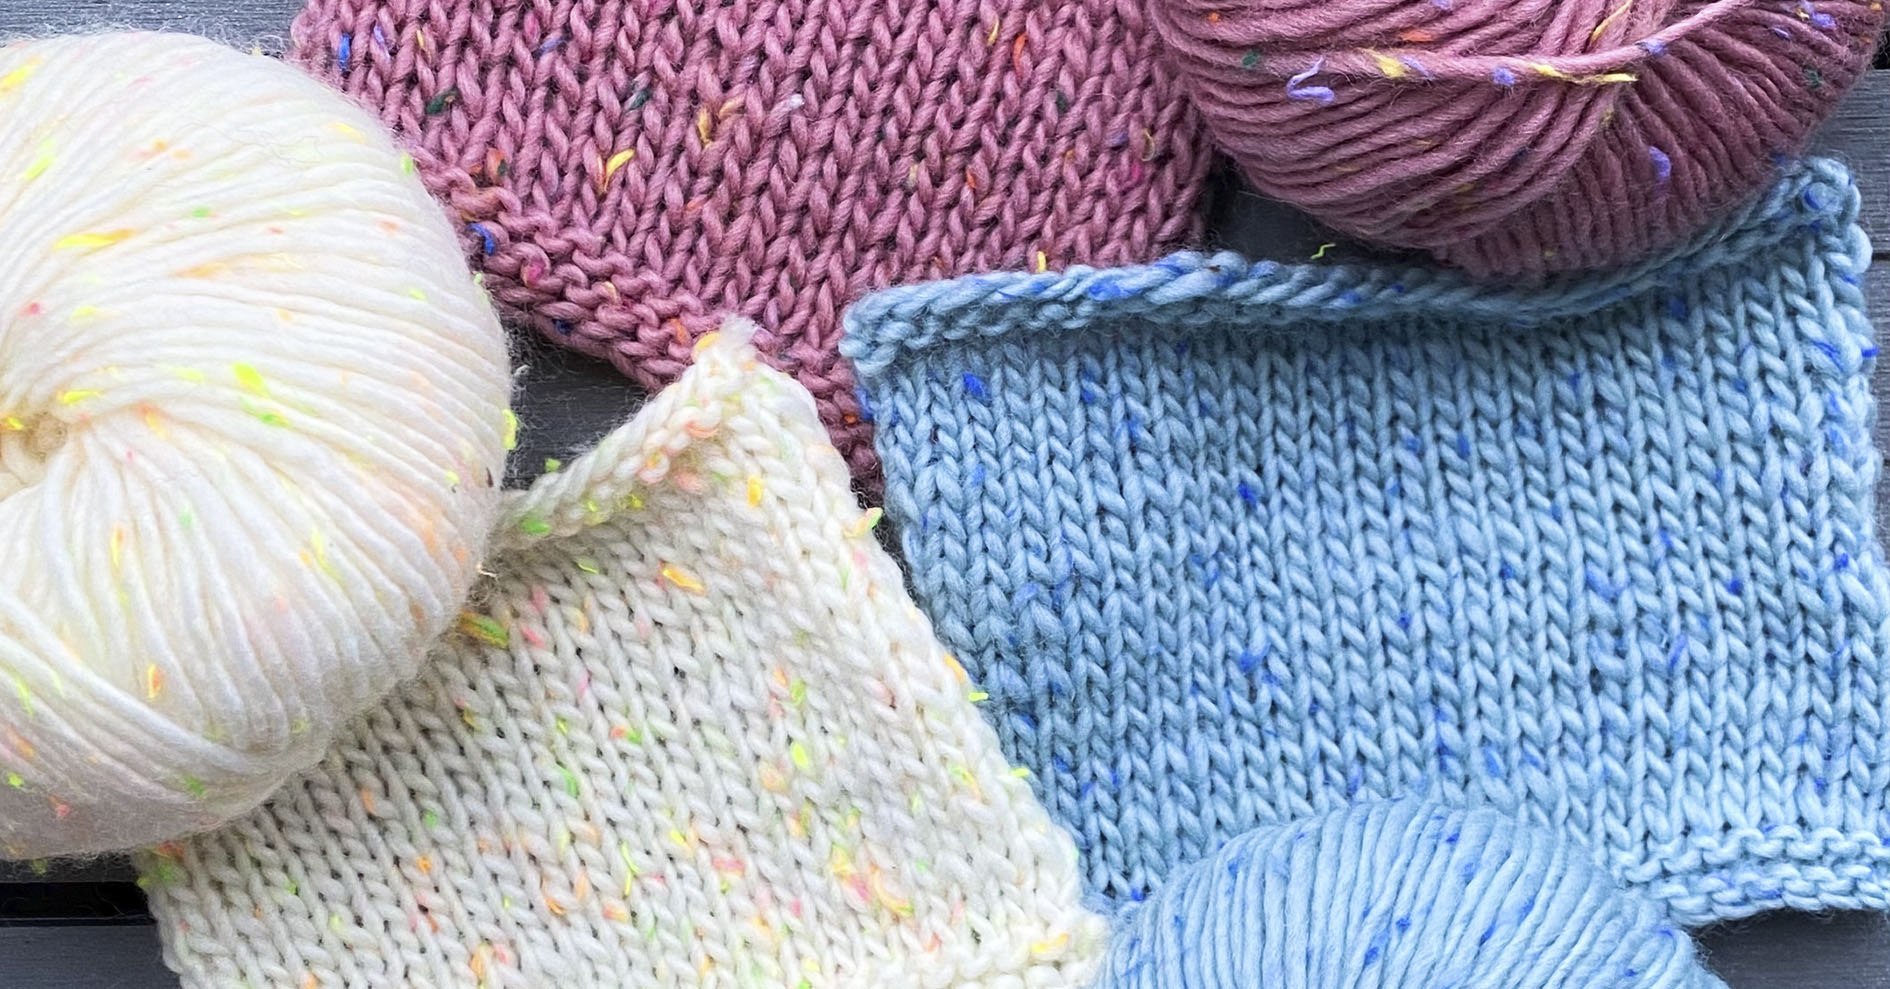
Photo: Karoline Vind Uhre Larsen
You might think it’s a waste of your precious time, but it’s actually more expensive not to knit a gauge swatch. Worst case scenario, your knitting will end up too large or small if the swatch deviates just 1 stitch from the knitting tension specified in the pattern, and it will become a huge waste of effort very quickly.
But don’t fret, as soon as you know how to make your gauge swatch, it’ll be easy as pie. We’ll try to guide you through all the things that are good to know when it comes to gauge swatches and knitting tension.
The guide has been set up as questions to better help you find the subjects that match your struggles:
What is knitting tension, and why is the gauge swatch important?
In any pattern, the knitting tension will always be specified. Knitting tension is a term for how large the stitches are and, thus, how many stitches a 10x10 cm (3.9”x3.9”) square should have for your work to match the measurements the designer calculated for the pattern.
Since we all knit differently, it’s important to note that the recommended number of rows in the pattern are ALWAYS meant as a guide. That’s why it’s important to make a gauge swatch before every new project, to make sure the size will be accurate.
How do I measure the knitting tension in my gauge swatch?
When measuring the knitting tension, you distinguish between the width and height of the stitches.
If the knitting tension is indicated as 22x30, it means that your gauge swatch should be 22 stitches wide and 30 rows in height when making a square of 10x10 cm (3.9”x3.9”):
You’ll find the width right here on the label 👇🏻

You’ll find the height right here on the label 👇🏻

You can use a regular measuring tape to measure your knitting tension, but if you want a more accurate result, we recommend a knitting gauge that you can put directly on your gauge swatch to measure exactly 10x10 cm (3.9”x3.9”).
How to count your stitches:
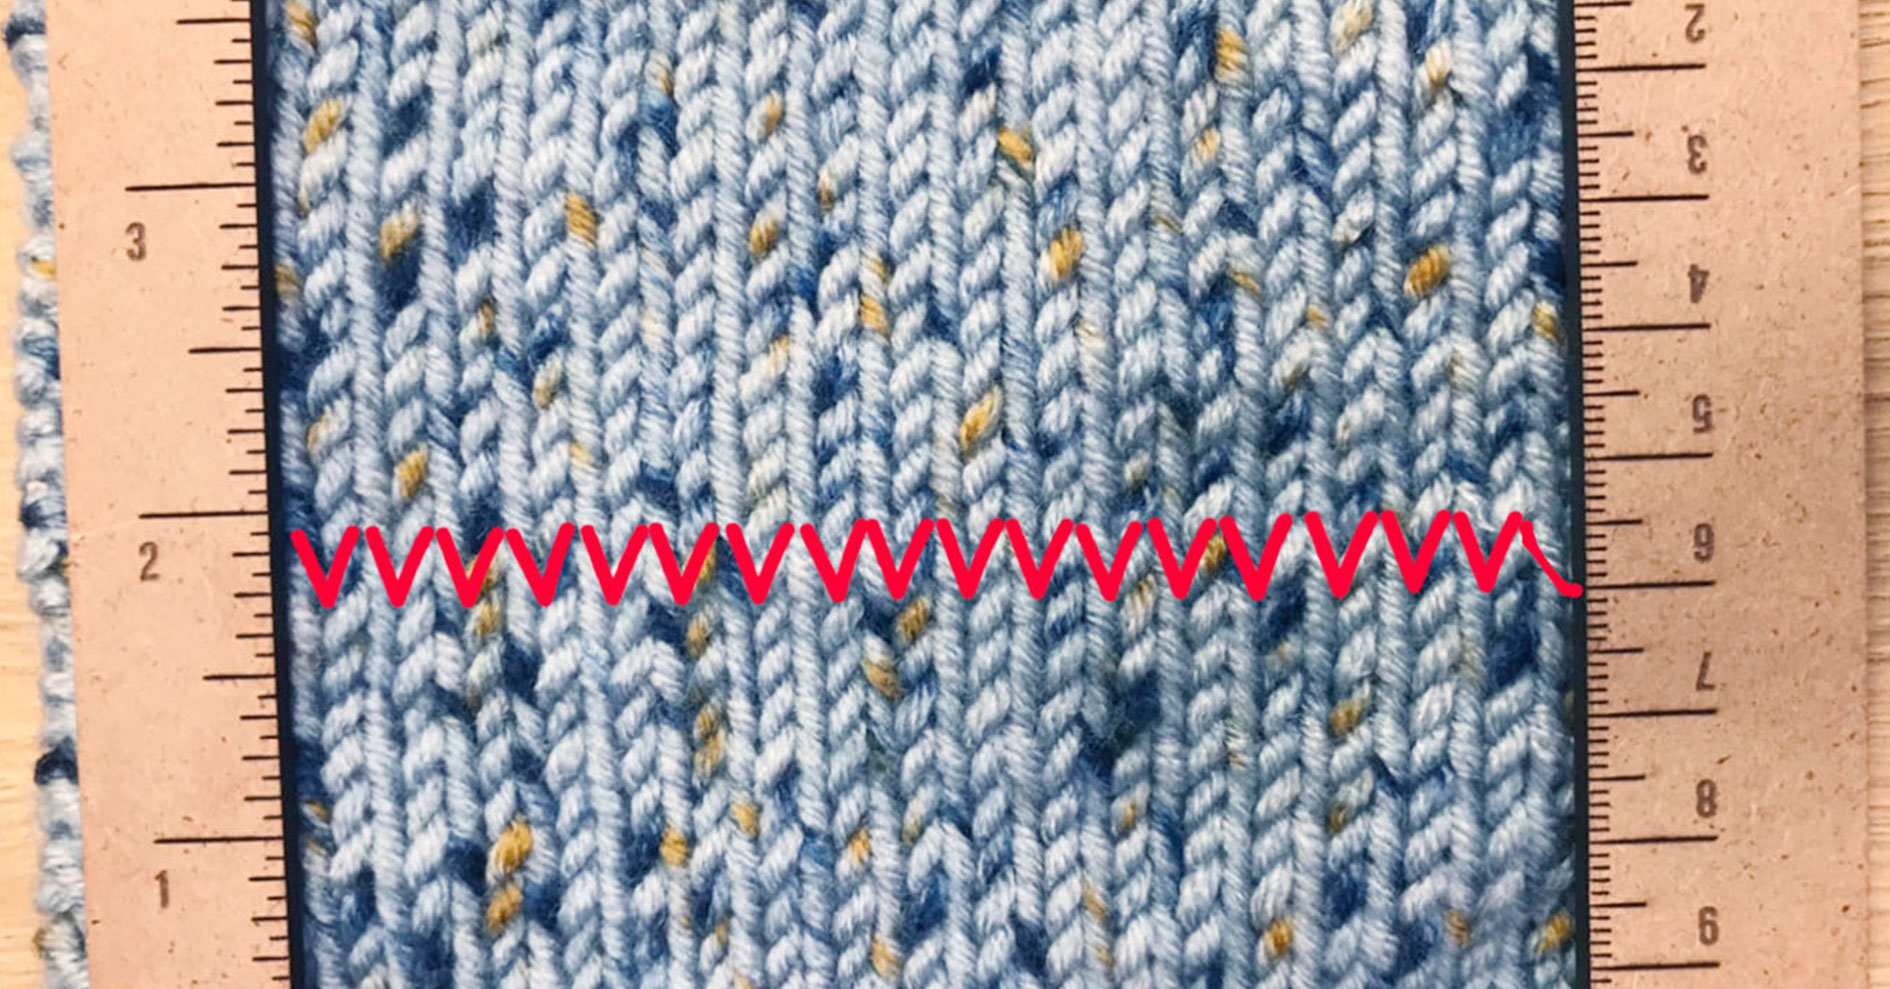
When counting the stitches, you need to count all the V’s. It’s important that you don’t measure at the edges where you cast on, but instead measure more towards the middle of the swatch to get an exact number. Remember to count all the stitches - even the half ones.
As shown in the photo below, the width in this example is 17,5 stitches 👇🏻
You count the V’s in the same way to get the height. In this example we have 24 stitches 👇🏻
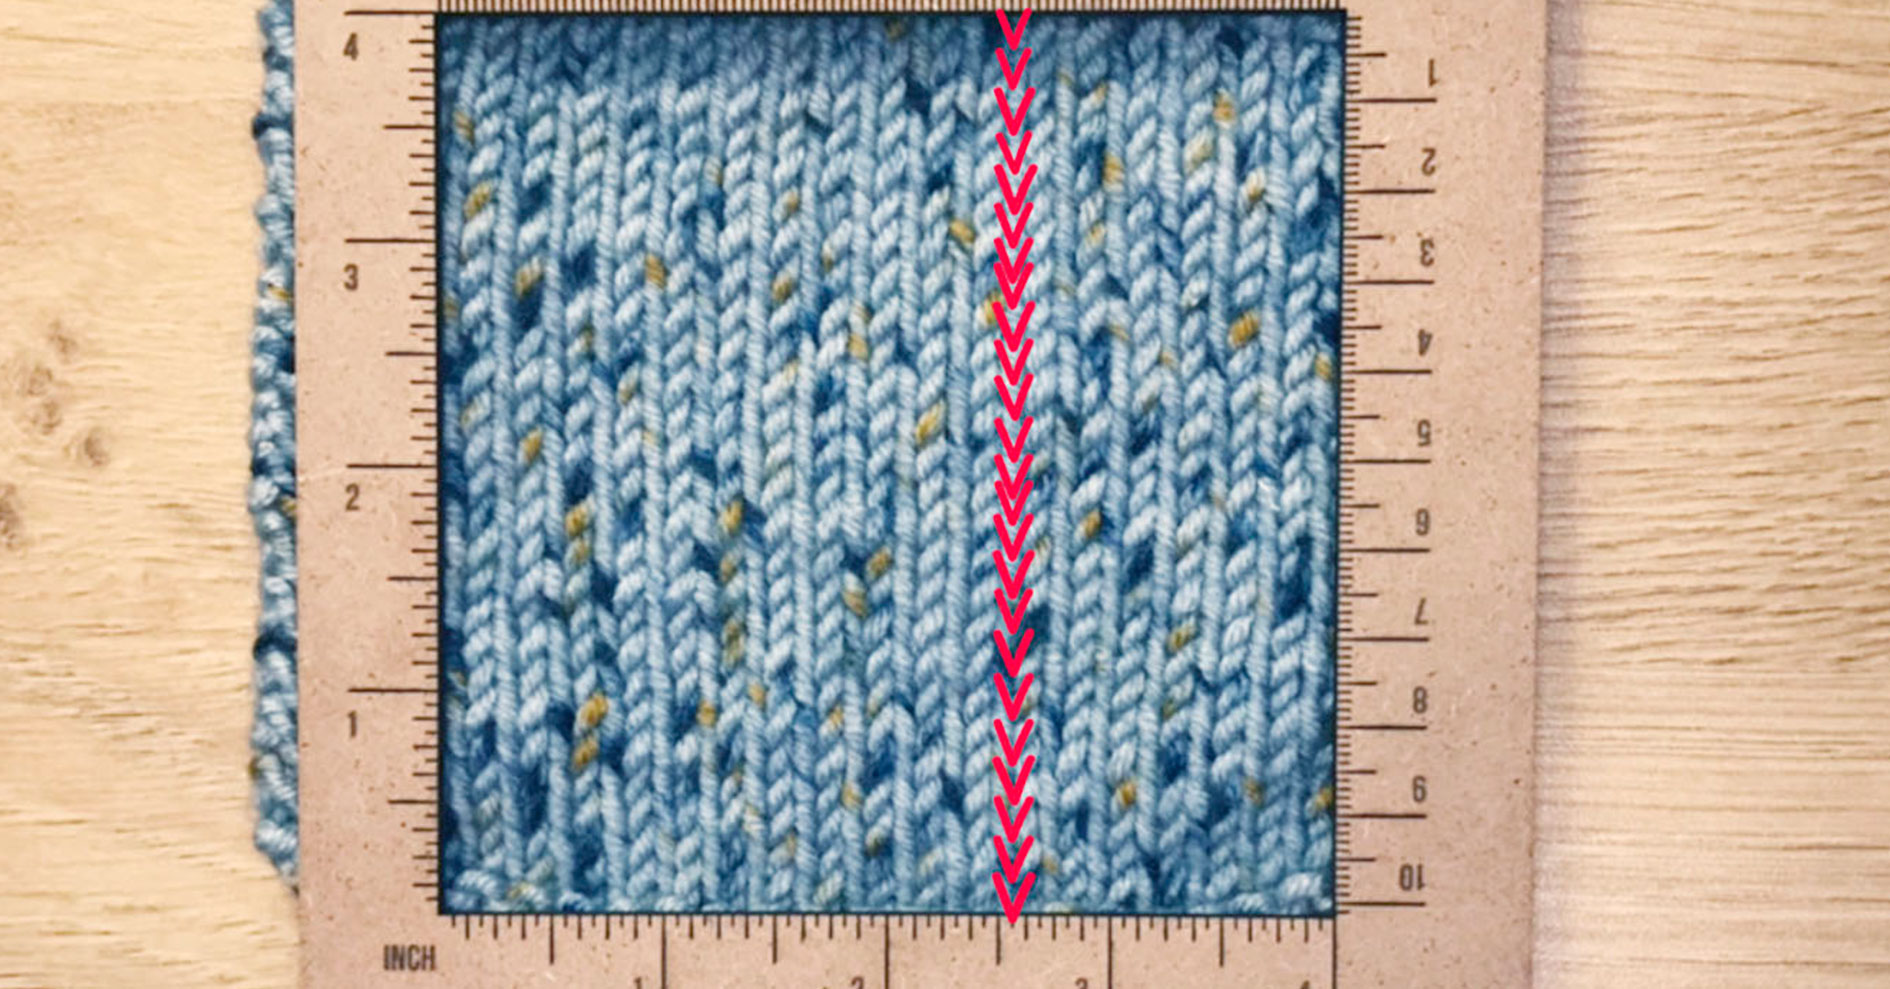
NB: Never count the stitch from the cast-on edge.
How many stitches do I need to cast on for my gauge swatch?
You should always cast on a minimum of 10 more stitches than what is specified for the knitting tension. That way, you get a nice, big swatch that’s easy to measure.
It’s the width-number that shows you how many stitches to cast on:
Example: The width of the knitting tension is 22. You should, in this case, cast on a minimum of 32 stitches to make sure you get a nice swatch that also has a large enough edge on the side.
What if the gauge swatch almost matches - isn’t that good enough?
The short answer: NO!
It’s very important that the gauge swatch matches exactly. A deviation in just 2 stitches may not look like much on the swatch, but it can result in many extra stitches overall if you’re, e.g., knitting a sweater.
Example: You’re knitting a sweater that’s 15 stitches wide, but you end up with 13 stitches. Every time you’ve knit 10 cm (3.9”), you’ve knit 13 stitches instead of 15 and have 2 stitches ‘left over’ compared to the pattern. Looking at the bigger picture, this will make the sweater a whole lot bigger than expected.
- 10 cm (3.9”) / 15 stitches = 0,66 cm (0.3”)
- 0,66 (0.3”)*2 extra stitches = 1,32 stitches left over every 10 cm (3.9”)
If you were to cast on 90 stitches for a size M, that would mean 90*1,32 = 118,8 stitches. In this example, the deviation of 2 stitches results in the sweater now being a size XXL instead of a M.
If, on the other hand, you have too many stitches in the 10 cm (3.9”) the shirt would be too small.
NB: In some cases a deviation of 1 stitch won’t matter much to the end result. That’s why it’s important to measure according to the percentage of the deviation. In the example with the 2 stitches left of the 15 it matters a lot. It results in the following calculation: 2 stitch deviation / the 15 stitches from the original knitting tension in width * 100 = 13,3% too big compared to the pattern.
What to do if the knitting tension doesn’t match?
Luckily, there are things you can do if you’re not matching the exact knitting tension:
If you have too few stitches: Go down a needle size, then the stitches will not take up as much space in the 10x10 cm (3.9”x3.9”)
If you have too many stitches: Go up a needle size, then the stitches will take up more space in the 10x10 cm (3.9”x3.9”) (you could also use a second strand of yarn to make the yarn thicker).
Use a different type of needle: Sometimes the knitting tension changes depending on whether you’re knitting with wood or aluminum needles.
If you’re in a pinch, you could try going up or down a size - e.g., knit a S instead of a M. However, this requires you calculating how big the percentage of the deviation from the original size is.
Don’t try to knit tighter or looser. You knit how you knit, and you won’t be able to keep up an unnatural knitting style for a whole sweater.
REMEMBER: Sometimes you have to admit that some yarns just won’t be able to match the knitting tension.
What’s more important - width or height?
Width, since it’s easier to adjust the height, because many patterns are knit from measurements. The width is hard to alter, and you risk the project becoming too wide or too narrow.
However, it’s important that the height is accurate in cases where you have to knit a certain amount of increases. E.g. if you’re knitting raglan increases.
Do I HAVE to wash my gauge swatch?
YES! If you want to make sure that your masterpiece will fit perfectly when wearing it, then you have to wash the swatch. Unless you plan on never washing the thing you’re knitting 😉
You risk the yarn either expanding or shrinking during the wash, and it would be a tragedy if the same thing happened to your hat, sweater, or other item after it’s been washed.
Should I use the same technique on the gauge swatch as the pattern?
YES! To make sure that the knitting tension matches the pattern, you have to knit the swatch using the same technique.
Meaning: If you’re knitting a hat using fisherman’s rib, then the swatch should also be fisherman’s rib. Knitting stockinette, then the swatch should be stockinette. If you’re knitting ribbed segments, then the swatch should also contain rib, etc. This way, you’re making sure that your gauge swatch actually reflects the project you’re about to start.
Should I knit a swatch every time?
As a rule, yes. Everything from the temperature outside to you becoming a more experienced knitter has an effect on the knitting tension.
You probably also use different yarns for different patterns, and, in that case, both techniques and needle sizes may vary.
Why is it a good idea to knit a border on the swatch?
To make it easier to measure the knitting tension, but also because you shouldn’t count the cast-on edge in your swatch.
How to knit the edge:
Knit 3 rows of knit stitches
After the first three rows, use knit stitches for the 3 first and last stitches for each of the following rows for the rest of the gauge swatch
Knit the swatch using whichever type of stitch the pattern specifies (fisherman’s rib, stockinette, garter stitch, etc.)
Finish the swatch by knitting 3 rows of knit stitches again and bind off
This way, you get a nice frame around your knitting, where you can easily measure the square in the middle without worrying whether you’re going to be counting the cast-on edge by accident.
Is it a good idea to save your gauge swatch?
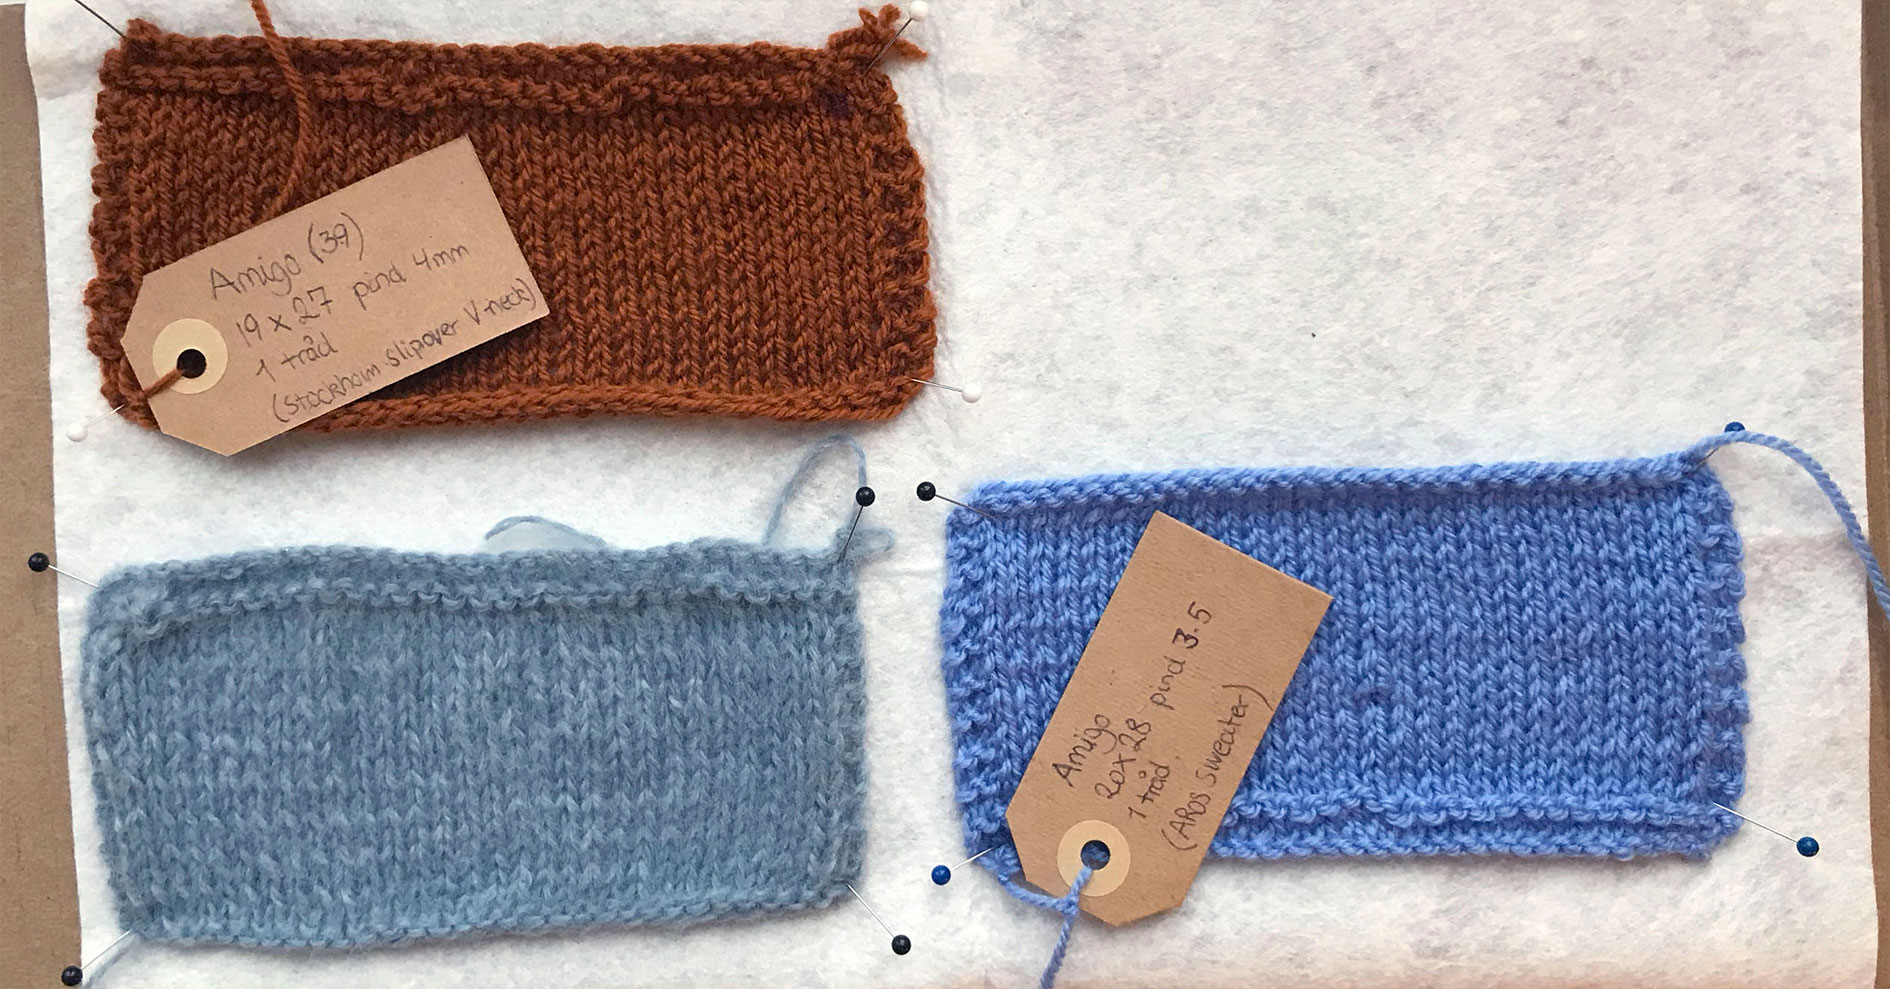
It can be if you’re planning on using the same yarn again later. You could, e.g., put labels on your swatches where you list all factors like knitting needle size, pattern, yarn, color code, etc.
When you do this, it’s easy to remember what you’ve used earlier and get a good idea of how you could use the same yarn in a different pattern at a later date, and whether it was even possible to match the knitting tension to begin with.
Shouldn’t you just be able to go off the specifications in the pattern?
You can’t always be 100% sure, since we all knit differently, and maybe you prefer using knitting needles made from birch rather than aluminum or vice versa. You have to factor in many different things, and there’s always a chance that you may have to go up or down a needle size, even though the pattern may tell you differently.
It’s also good to know that you could knit the pattern in a different yarn that has a different color or texture. You may be allergic to wool and, thus, have to exchange the yarn for one that doesn’t contain wool. Or maybe you want to find a cheaper alternative, or maybe you just like another color better?
In these cases it’s extra important to knit a knitting swatch since a different yarn could result in a totally different look. But an alternative is always doable.
Why should you block your gauge swatch?
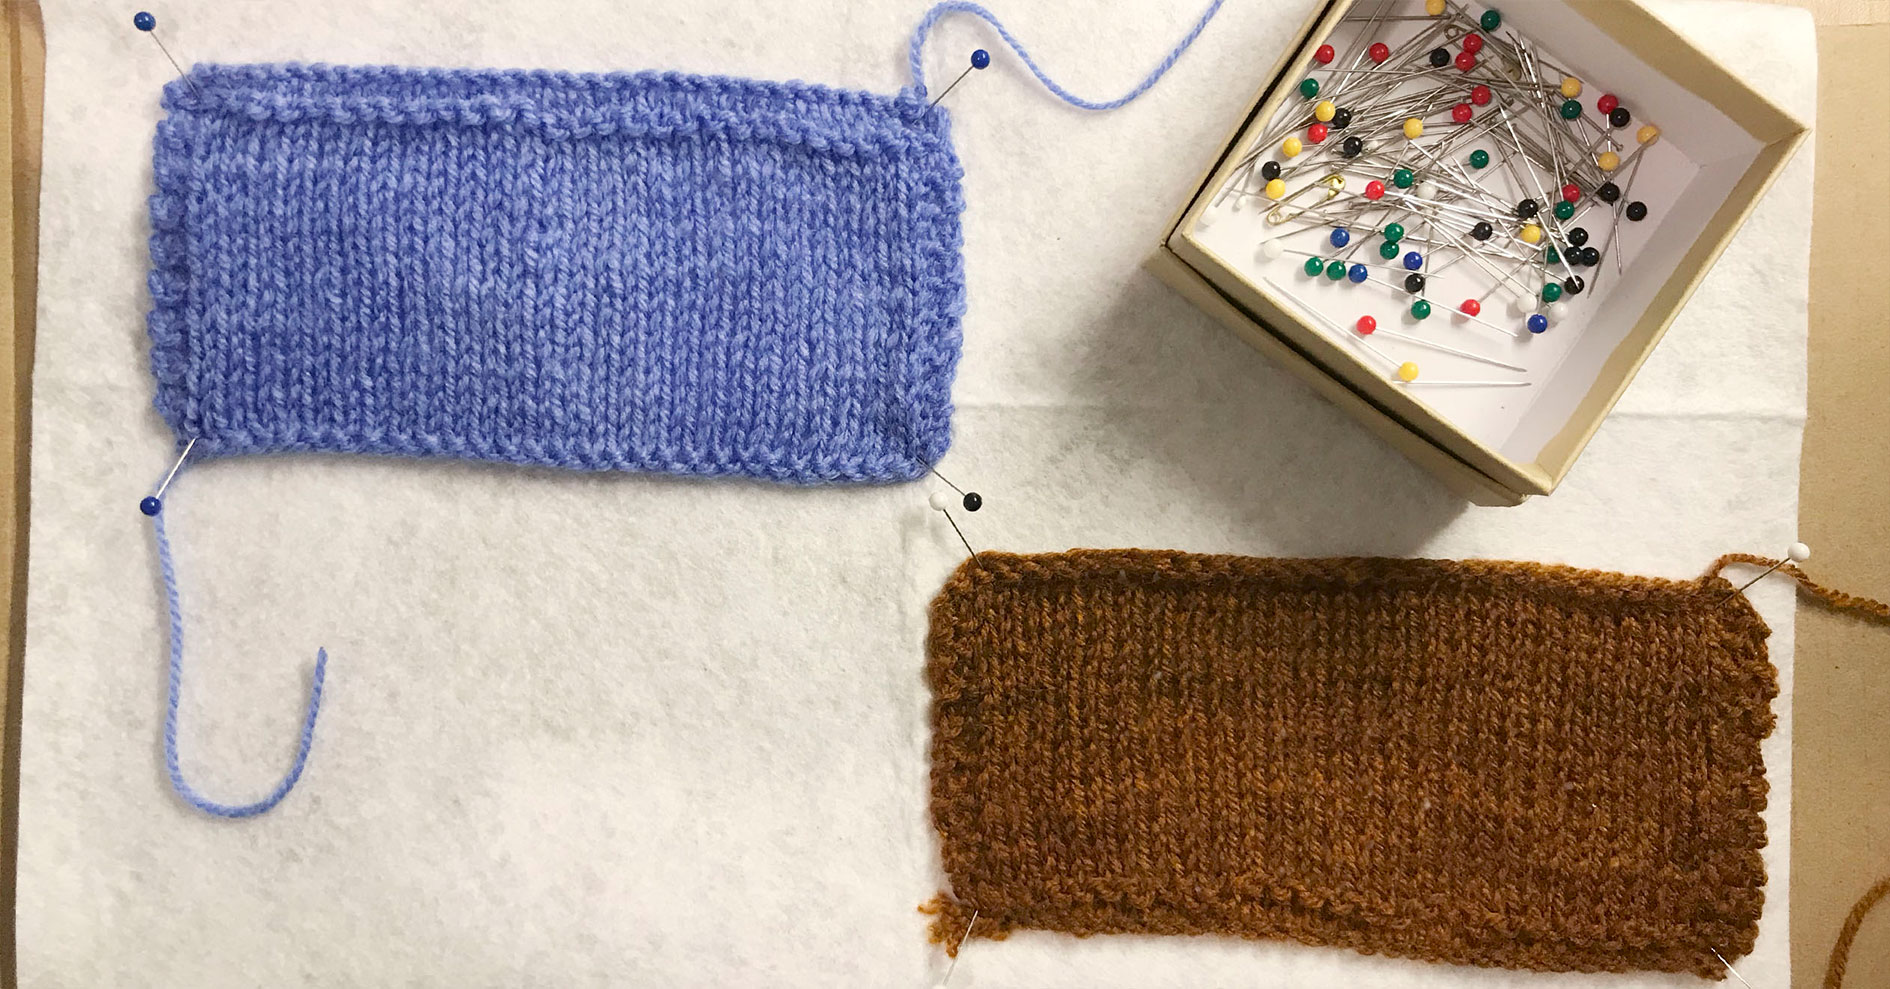
The gauge swatch may shrink or become uneven while it dries after it’s been washed (especially rib). That’s why it’s a good idea to block the swatch with needles while it’s still wet. It ensures that you get a nice, even surface that’s easy for you to measure the knitting tension on, when it’s dry.
You block the swatch by gently stretching the piece into its original form after it’s been washed. Then you add needles along the edges and wait for the gauge swatch to dry.
Once the swatch is dry, you can start measuring.
Do you still have questions about gauge swatches, or do you have some tips of your own to share? Please write a comment below 👇🏻


Leave a comment