One of my favorite things to crochet is amigurumi. The progress is fast, so you can see the results quickly. But where it almost always stalls when you make amigurumi is when you need to join the pieces. It’s really tedious! So, that’s why I’ve gathered my best tips and tricks on how to make the joining process a little easier.
1. Always leave a long end when you’re done
It’s always a good idea to leave a long yarn end when you’re done with a part of your amigurumi. That is the end you’re going to use later to attach the piece to the other pieces to finish the project. It’s a lot easier than having to use a brand new strand of yarn - and you only have to weave in one end 😉
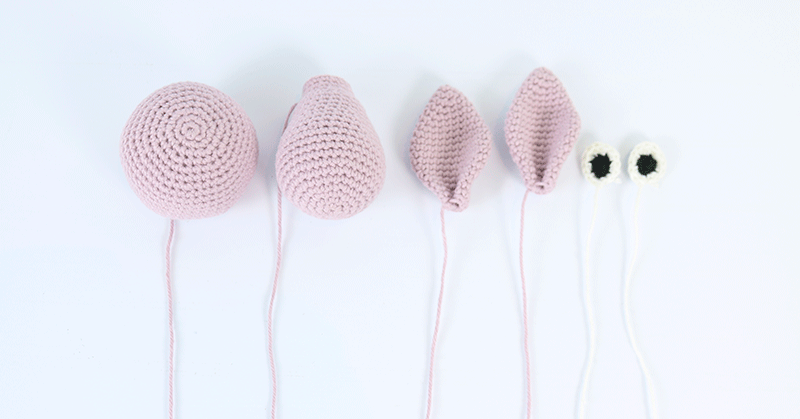
Some designers already note that you should leave a long yarn end for joining later, but not everyone does, so you should do it, just in case - and if you find out you didn’t have to, then all you have to do is weave it in as per usual. No harm, no foul.
If you need some new yarn for your next amigurumi project, then you should try the lovely Rainbow Cotton 8/4, which comes in many beautiful colors.
2. Use pins to keep the pieces in place
When I first started joining pieces, I struggled to hold the stuffed animal and the part that needed to be attached, while I also had to sew - it really wasn’t easy, I can tell you that!
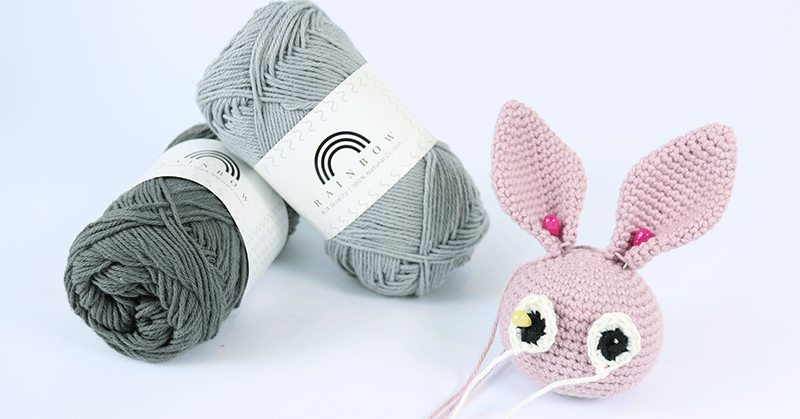
But then I got some great advice from a crocheting friend: Use pins! Pins help you hold the pieces in place so you can concentrate on sewing, and the pieces won’t move around if your hand slips by accident.
3. Plan where and how the pieces should be attached
Another advantage to using pins is that you can plan what kind of look you want your amigurumi to have. Do you want the ears to be close or far apart? Should the eyes be positioned high on the head or lower towards the mouth?
It’s much easier to decide when you use pins to hold the different pieces in place. You may end up spending a lot of time finding the perfect look, but it really pays off in the end.
4. Safety eyes vs. crocheted eyes vs. embroidered eyes
Many patterns use safety eyes, but for very small children (under 3 years old) it can be a good idea to consider whether some crocheted eyes you make yourself or embroidered eyes are better since the safety eyes may become a choking hazard if they, for some reason, were to fall off.
In addition, it can give your project a totally different look and expression, and it can actually be really fun to play around with. Personally, I prefer crocheted or embroidered eyes because I think they add more life to the amigurumi ✨
5. Tips for embroidered details
It can be a little difficult to figure out how to weave in ends when you’re making embroidered details like eyes or a mouth - at least, I used to think so when I first started.
What I do nowadays is to start by inserting the yarn from the back of the head, if I’m making something like eyes, and leave a long enough end at the back to be able to weave it in when I’m done. When I’ve embroidered what I need to, then I work the yarn through the same place at the back of the head where I initially inserted the yarn.
Then I tie a knot on each end and work the yarn back into the head again so the knot is hidden in the work. I do this with both ends - and voila! Then you don’t have to worry that it’ll become loose or fall off.

And you can even embroider the eyes, nose, and mouth in one go if they’re all the same color - long live laziness, am I right? 😉
6. Refill before you close it up
When you’re joining pieces that have filling in them (like joining a body to a head), then my experience is that it can be a little tricky to do so if they’re stuffed to the max.
What I usually do is leave some air before I attach said piece, and when I’m 5-10 stitches from closing it completely (depending on how large the part is and how much extra filling is needed), then I fill the cavity.
It’s a good idea to fill it slightly more than you’d think is necessary because when the final project is played with, the filling will compress, and the result is a floppy teddy/doll - and that would be sad.

I prefer to use polyester filling because it’s soft and easy to shape.
7. Be patient
Most importantly, you need to be patient! Patience with yourself and the project. Practice makes perfect, as we all know, and I’m surprised at how fast my joining has become after more than 3 years.
Joining takes time, but if you give it time, then it’s going to look really good 😊
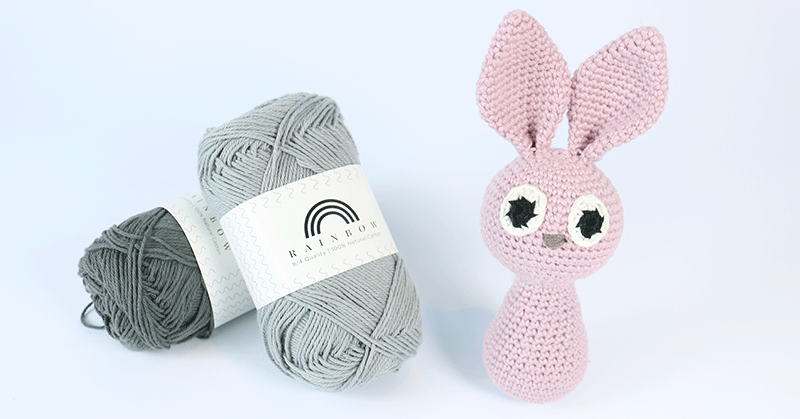
That was some of my advice. If you have any other advice that you live by and you think would help others, then you’re more than welcome to write them in the comments below.
Have fun with your future amigurumi projects!
Love,
Eva
